
Binho Nova: Setup
Connection to the Host PC
Section titled “Connection to the Host PC”Connect the Nova’s USB Type-C port to the computer with the supplied USB Type-C to Type-A cable. The Nova is powered from USB (5 V, 200 mA). It is a USB 2.0 Full-Speed device (12 Mbps).
The Nova is a USB serial device (CDC): a COM port on Windows, /dev/ttyACM* on Linux, /dev/cu.usbmodem* on macOS. Windows 10 and later, macOS and Linux include the driver. On Linux, add the current user to the serial group, usually dialout, as described in Solving USB Connection Issues on Linux.
At power-up the status LED is yellow: the Nova is waiting for its COM port to be opened. Once an application opens the port, the LED turns blue.
Check that the computer sees it
Section titled “Check that the computer sees it”Install the Nova Python package and list the connected Novas:
pip install binhobinho infobinho info prints each Nova’s serial number, COM port and firmware version, and says if a Nova is in bootloader or DAPLink mode. See Nova SDK.
Connection to the Test Circuit
Section titled “Connection to the Test Circuit”The Nova has an integrated wire harness that ends in a 1.27 mm pitch 2×5 IDC connector: 5 signal pins, one 3.3 V pin, one VUSB pin and 3 GND pins. Plug it into the supplied breadboard breakout to reach the pins with 2.54 mm jumper wires.
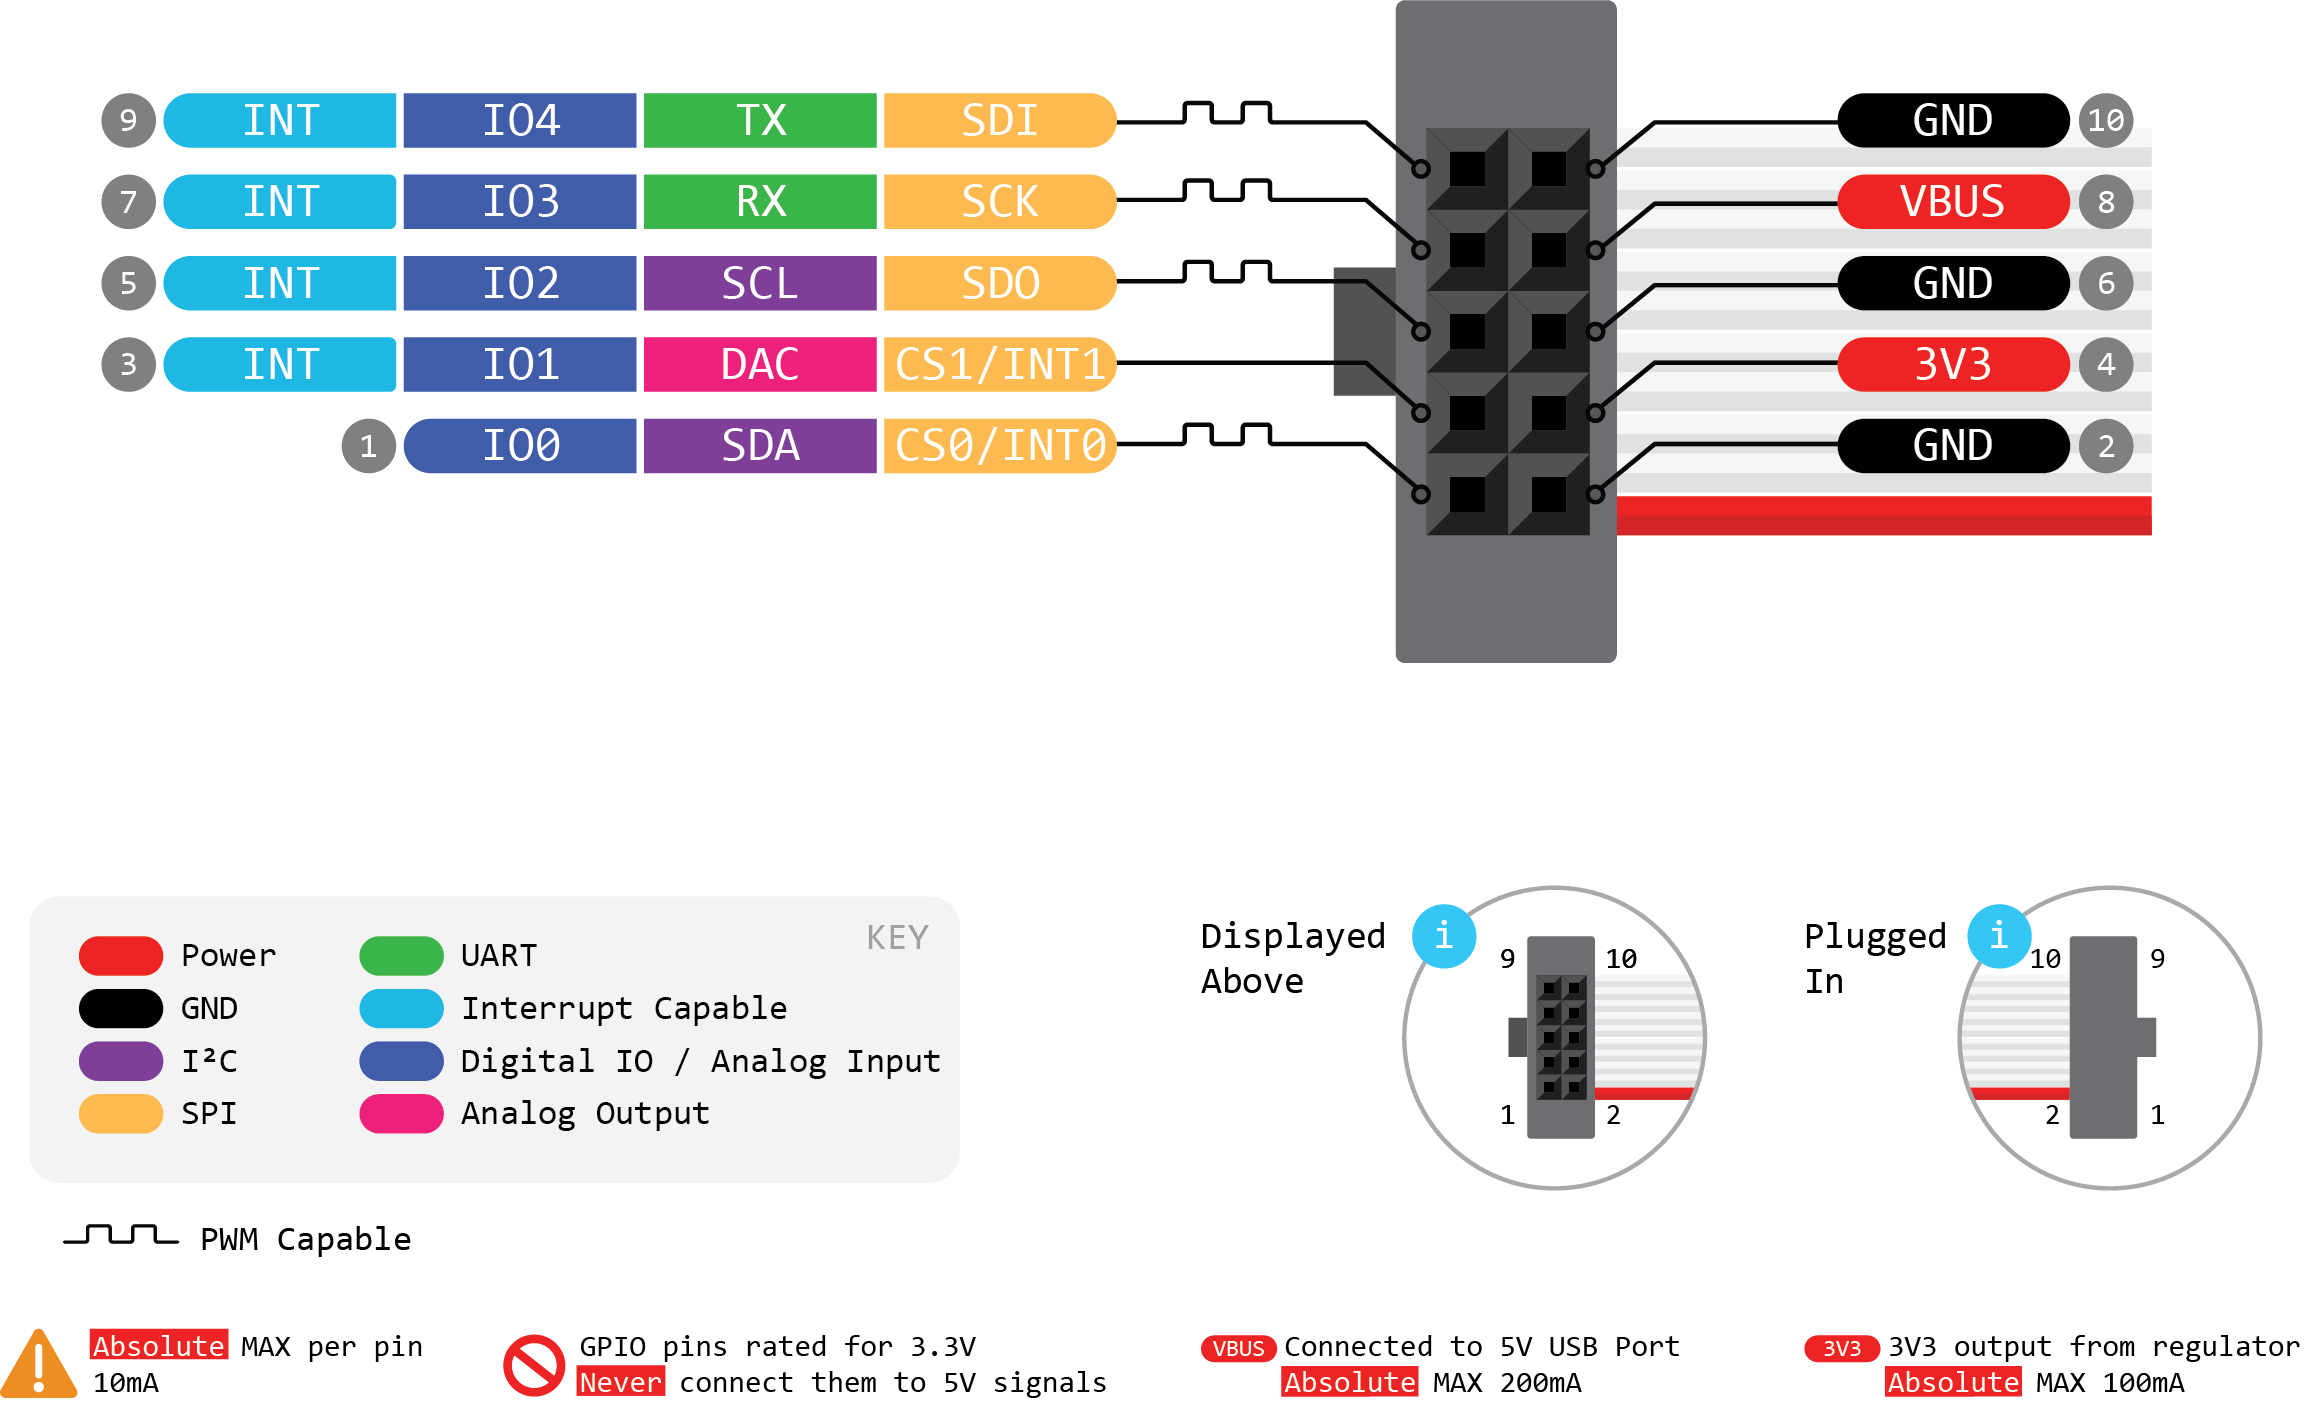
- All signals use 3.3 V logic. The Nova has no adjustable target voltage; level-shift if the board runs at another voltage.
- The 3V3 and VUSB pins can power a small target. The whole Nova draws at most 1 W from USB.
- Always connect ground between the Nova and the device under test.
For what each pin can do in each mode, see the Pinout Guide.
First Steps
Section titled “First Steps”- Without code: install Mission Control 2 and connect to the Nova from its device list.
- From Python:
pip install binho, then follow the Nova SDK page.